Wednesday, December 28, 2016

Populate and Sign Buyer Representation Agreements from Salesforce

Managing your real estate agency via a CRM like Salesforce is a great way to maximize your sales efforts and keep your clients happy.  With tools to track new leads, manage deals, and communicate with current clients, Salesforce can keep your entire team on the same page.

With WebMerge, you can instantly take data from Salesforce and automatically populate all of your real estate paperwork.  From agreements to offer letters to closing documents, you can populate all these documents with the click of a button.

In this example, we’re going to show you how to automatically generate a buyer representation agreement from inside Salesforce and then we’ll send that agreement over to HelloSign for e-signature.

To get started, we’re going to setup the template for our agreement using a Word document.  Inside Word, we’re going to add our boilerplate agreement info then for the spots that we want to insert our client’s information, we’re going to use merge fields like {$FirstName}, {$Address}, etc.

Here’s what our buyer representation agreement template looks like:
 

Since we’ll be sending the agreement over to HelloSign for signature, we need to add a HelloSign signature tag to our template so that HelloSign knows where to embed the signature.  The signature looks like:    [sig|req|signer1]
 

Once we have our template finished, we need to upload it to WebMerge.  From the Documents page in WebMerge, click the New Document button and then enter a name.  On the next step, pick Office Document as the document type and then pick the file from your computer.
 

After you’ve uploaded your template to WebMerge, you’ll be taken to the Settings tab where you can modify various options like the type of file that is generated and the name of the file.  For this example, we’re going to generate a PDF and then include the name of the client in the file name.
 

Next, we’re going to setup the delivery of our document to HelloSign so that it is automatically sent to our client for signature.  From the Deliver tab, click the New Delivery button and select HelloSign.  After you enter your HelloSign API Key, you’ll need to pick the merge fields for the signer’s name and email address.
 

After we save our HelloSign delivery, we are done with the setup process in WebMerge and we’re ready to integrate our agreement with Salesforce using our managed package from the AppExchange.

Inside Salesforce, we’re going to setup a new WebMerge Mapping.  This Mapping tells Salesforce how to pull information from Salesforce and send it over to WebMerge so that it populates the template correctly.
From the WebMerge Mappings tab, create a New Mapping.  Go ahead and enter a name, then pick Contact as the Salesforce Object, then pick the Buyer Representation Agreement for the WebMerge
Document.
 

Continue to the next step and you’ll see the same fields at the top, but then we need to scroll down to the Field Mapping section.  This is where you’ll see a list of all the merge fields in your template and you’ll need to pick the corresponding Salesforce field from the dropdown on the right.
 

Once you have matched up all of your merge fields, go ahead and save the Mapping.  We’re ready to test the document!  Go ahead and open up one of your contacts and you’ll click the WebMerge button.
 

Once you click the WebMerge button, the data will be sent over to WebMerge and your agreement will be generated and sent to HelloSign.

Here’s what our agreement looked like ready to sign in HelloSign:
 

Congrats, you’re all done!  You can now instantly generate all types of real estate paperwork from your Salesforce account.  Can you think of any other ways you can use WebMerge to simplify your paperwork process?


Friday, December 16, 2016

Automatically Fax Court Filings from Salesforce using Phaxio

Filing your court documents are an important part of the legal process and can also be time consuming.  However, many courts still accept filings via fax and that can be a great way to save time.  Especially when you use a service like WebMerge to automatically generate the court documents and send them via fax service like Phaxio.

In this example, we’re going to show you how you can generate court documents with the click of a button from Salesforce and automatically fax them to the court using Phaxio.  We’ll be using our friends over at Zapier to help send the fax with Phaxio.

To get started, we’re going to setup our document (template) in WebMerge.  We’ll be using a Fillable PDF as our template.  This PDF will have a field for each piece of information we’ll be pulling from Salesforce.

Here’s what our document looks like:


When your PDF is ready, let’s upload it to WebMerge.  From the Documents page in WebMerge, click the New Document button then type in a name for the document.  On the next step, choose Fillable PDF as the document type and then pick the PDF file from your computer.


After you’ve uploaded your PDF, you’ll be taken to the Settings tab for your document.  On this page you can update things like the type of file that is produced and the name of the merged file.  For this example, we’re going to generate a PDF and we’re going to include the Case Number in the file name.


Once you’ve saved the settings, you’re going to be taken to the Deliver tab.  This is where you can define how you want the merged document delivered.  To send the document to Phaxio, we’re going to setup a new Webhook delivery.

But first, we need to setup a Zap in Zapier so that we can setup the webhook in WebMerge.  From inside Zapier, click the New Zap button.  For the Trigger, you’re going to select WebMerge and then pick New Merged Document as the trigger.


Zapier will have you authenticate your WebMerge account and then do a test merge.  They’ll give you a URL to enter for your webhook.  Take this URL and go back over to WebMerge and setup a New Webhook delivery.  Enter the URL that Zapier gave you into the webhook setup.


After you save the webhook in WebMerge, you’ll need to do a quick test for Zapier (to make sure everything is working).  Go ahead and click on the Merge tab in WebMerge and select the Manual Data Entry option.  This will give you’re a Form URL that you can enter test data and it will merge a document and send it over to Zapier.


After you’ve submitted the test, go back over to Zapier and finish the WebMerge trigger setup.  Next, you’re going to setup the “action” of the zap.  You’ll want to pick Phaxio as the app and then Send Fax as the action.


Zapier will have you authenticate your Phaxio account and then you’ll setup the fax settings by defining the fax number and then the file that you want to send over.  Go ahead and complete that step by adding the WebMerge field (click the button on the right).


Once you’ve mapped the fields, follow the remaining steps and then activate the Zap.  Now, you’re ready to setup that last piece of the puzzle and integrate with Salesforce.
If you have not done so already, please install the WebMerge managed package from the AppExchange and follow the setup instructions here.

Inside Salesforce, we are going to setup a New Mapping that will serve as the integration point between our Salesforce data and WebMerge document.  From the WebMerge Mappings tab, click the New WebMerge Mapping button.  We’re going to select the Case object and then pick our template that we just setup in WebMerge.


On the next step, you’re going to scroll down to the Field Mapping section on the page.  This is where you’re going to match up the Salesforce fields with the merge fields that are in your template.  For each merge field (listed on the left), go ahead and pick the corresponding SF field from the dropdown on the right.


After you have all of the fields matched up, go ahead and click the Save and Activate button at the bottom of the page.

Now, it’s time to run a test!  Go ahead and jump over to one of your cases and click the WebMerge button on the page.  This will take your case information, send it over to WebMerge.  WebMerge will populate our PDF and then send out the webhook which will deliver the document to Phaxio for faxing!

Here’s what our court document looked like after merging:


Congrats!  You can now send faxes from Salesforce using Phaxio with the click of a button.  Can you think of any other ways that you could use WebMerge to simplify your paperwork process?


Tuesday, December 6, 2016

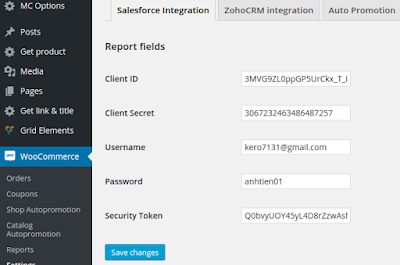
Woocommerce Salesforce CRM Integration


The Woocommerce Salesforce integration Plugin is an indispensable tool to help you synchronize data instantly between Woocommerce and Salesforce. The plugin allows to synchronize register customers in Woocommerce to Lead in Salesforce, order in Woocommerce to Account and Contact in Salesforce.
Key features Woocommerce Salesforce CRM intergration allows sync following data:
  • Synchronize Registered customer from Woocommerce to Lead in Salesforce CRM
  • Synchronize Order from Woocommerce to Account in Salesforce CRM
  • Synchronize Order Products from Woocommerce to Salesforce CRM
  • Synchronize Order from Woocommerce to Salesforce CRM


Links and relevant references

Building E-Commerce Solutions with WooCommerce - Second Edition

Building E-Commerce Solutions with WooCommerce

E-Commerce Blueprint: The Step-by-Step Guide to Online Store Success

Monday, December 5, 2016

Collect Signatures for Contracts, Quotes, and Proposals using HelloSign


In today’s internet-driven world, the possibilities of improving your business processes are endless.  From marketing to sales to customer service, you can deliver a much better customer experience by leveraging online tool.

One great tool you can use to collect fast and secure e-signatures is HelloSign.  With HelloSign you can handle all of your signatures under one roof using a legally binding platform that allows your customers to sign documents from virtually anywhere.

Add WebMerge to your processes and you can automate all of your paperwork with the click of a button.  With WebMerge you can setup automation to populate templates with data from your favorite CRM, online form, internal system, etc to generate professional documents (contract, invoices, letters, and more).

Plus, you can instantly send these documents to HelloSign for e-signature without having to upload any documents or send out any links to your customers.  WebMerge and HelloSign handle everything for you!

In this example, we’re going to show you how to use WebMerge to generate a contract from Salesforce for a deal we have closed and then collect the customer’s signature using HelloSign.

To get started, we’re going to setup our contract template using a Word document.  Inside our Word document, we’re going to add our boilerplate contract details and then we’re going to add merge fields for the spots in our document that we’d like our deal information to go.

These merge fields are just like any other text in our document and look like {$FirstName}, {$CompanyName}, {$Amount}, etc.

Here’s what our contract template looks like:
 

Since we’ll be collecting a signature for this contract using HelloSign, we need to define where we want the signature to go in the document.  HelloSign has “Text Tags” that you can use to indicate the spot in the document that you want to place the signature (more info).  These text tags are just text and they look like:    [sig|req|signer1]
 

After we have our template finished, we’re ready to upload it to WebMerge.  From the Documents page in WebMerge, click the New Document button and then enter a name for the document.  On the next step, you’re going to pick Office Document as the document type and then pick the file from your computer.
 

Once you have uploaded your template, you’re going to be taken to the Setting tab.  On this page you’re going to be able to customize various settings like the type of file that is generated and the name of the file.  For this example, we’re going to be generating a PDF and then we’re going to include the name of our deal in the file name.
 

After we’ve updated our settings, we’re ready to setup the delivery of our document to HelloSign so that the contract is automatically sent out for signature.  Head over to the Deliver tab and click the New Delivery button, then select HelloSign from the list.

You’ll be asked to enter your HelloSign API Key (which you can find in your HelloSign Account), then you’ll need to define the name and email address of the signer.  We’re going to be using merge fields for the signer’s information because it will be coming from Salesforce.
 

After you have saved your HelloSign settings, you’re all done with the setup inside WebMerge and we’re ready to setup the integration with Salesforce so we can generate this contract with the click of a button.

If you haven’t already, install the WebMerge Managed Package from the AppExchange and run through the setup process.
Inside Salesforce, we’re going to setup a new Mapping for the contract we setup.  Under the WebMerge Mappings tab, click New WebMerge Mapping. 

We’re going to give the Mapping a name “Contract” and then we’re going to choose the Opportunity object as our primary object where the data will come from.  Then we’ll pick the contract template that we setup in WebMerge and continue.
 

Next, we’re going to be taken to a page where we can map the fields from our Opportunity object to the merge fields in our contract.  For each of the merge fields, you’ll need to match up the corresponding Salesforce field.  This tells the system how to send your data over to WebMerge so that it is placed in the proper spot in your template.
 

Once you have all of the fields matched up, go ahead and save and activate the mapping.  You’re now ready to merge a contract!

Go ahead and pick on of your Opportunities and then click on the WebMerge button on the record detail page.
 

When you click the WebMerge button, it will send the data from your Opportunity over to WebMerge, your contract will be generated, and then the contract will be sent over to HelloSign for signature.  It’s that easy!

Here’s what our contract looked like ready to sign in HelloSign:
 

Congrats, you’re all done!  You can now automatically populate all types of documents using WebMerge and collect signatures with HelloSign.  Can you think of any other ways that you could use WebMerge to simplify your paperwork process?


Friday, December 2, 2016

Automatically Generate Packing Slips from Salesforce Opportunities

With a tool like Salesforce, you can organize your entire sales process from lead to sale to delivery.  With its robust tracking and automation features, Salesforce can keep your entire team on point.

Another way you can improve your sales process is by using WebMerge to automatically generate documents like contracts, invoices, quotes, and more.  For this example, we’re going to show you how to automatically send a packing slip to your shipping department when an Opportunity in Salesforce is updated to “Ship Order”.

To get started, we’re going to setup the template of our packing slip using a fillable PDF.  Using a PDF editor, we’re going to add fields where we want the order information to go.  Here’s what our packing slip template looks like:
 

Once we have our template ready to go, we need to upload it to WebMerge.  From the Documents page in WebMerge, click the New Document button and enter a name.  On the next step, select Fillable PDF as the document type and then pick the file from your computer.
 

After we have uploaded our template, we’ll be taken to the Settings tab where we can modify various options like the type of file that is generated and the name of the file.  For this example, we’re going to generate a PDF and then we’re going to include the opportunity ID in the file name.

In our PDF, we have line items that we’ll need to pull from a list of line items coming over from Salesforce.  To do this, we need to use the Field Map which you can turn on under Advanced Settings.
 

Next, we’re going to setup the Field Map.  Head on over to the Field Map tab and you’ll see a list of all the fields in your PDF.  For the line items fields, we’re going to add merge fields like {$LineItems.0.Name}, {$LineItems.1.Name}, etc.
 

Next, we’re going to setup the delivery of our document so that it is automatically emailed to our shipping department for processing.  Under the Deliver tab, we’re going to edit the default email delivery.  For the To address, we’re going to enter the email address of our shipping department.  Feel free to change any of the other settings.
 

Once we have our email delivery finished, we’re done with the setup process in WebMerge and we’re ready to integrate with Salesforce.

For the integration, we’re going to use the WebMerge managed package that you can install from the AppExchange.

Inside Salesforce, we’re going to setup a new Mapping for our packing slip.  On the New Mapping page, we’re going to give the mapping a name and then we’re going to select Opportunity as the Salesforce object, then pick the Packing Slip document that we just setup in WebMerge.
 

On the next step, we’re going to match up all of our merge fields with the corresponding fields in Salesforce.  This tells the managed package how to pull data from Salesforce and send it over to WebMerge so that it is populated in the correct spot on our document.
 

So that our packing slip is automatically generated when the opportunity is completed, we’re going to use the Process Builder.  Go ahead and create a new process, and we’re going to monitor the Opportunity object and watching for a change to the status.
 

Now we’re ready for a test!  Open up one of your opportunities and then update the status to trigger your process builder to run.  The managed package will then send your opportunity information over to WebMerge and your packing slip will be sent to the shipping department via email.

Here’s what our packing slip looked like:
 

Congrat’s, you’re all finished!  You can now automatically generate all types of documents from your Salesforce org.  Can you think of any other ways that you can use WebMerge to simplify your paperwork process?


Thursday, December 1, 2016

Automatically Populate Documents from Salesforce and Save in Egnyte

File sharing is an important piece to any business and with a tool like Egnyte, you can easily share files with your entire team and from any device.  With features like auto-sync and change tracking, you’ll always have an updated file system in place.

With WebMerge you can automatically generate documents such as contracts, invoices, and more from hundreds of different cloud services.  Add Egnyte to the mix and you can automatically share your merged documents with your team without lifting a finger.

In this example, we’re going to show you how to automatically populate a PDF application from Salesforce and then automatically place it in a customer-specific folder on Egnyte.

To get started, we’re going to setup the template for our application using a fillable PDF.  In a PDF editor like Nitro, you can add fields to the PDF.  Go ahead and name them without using spaces like: FirstName or Last_Name.

Here’s what our application template looks like:
 

Once we have our template ready, we need to upload it to WebMerge.  From the Documents page in WebMerge, click the New Document button and enter a name.  On the next step, pick Fillable PDF and then pick the file from your computer.
 

After you upload your template, you’re going to be taken to the Settings tab where you can change various settings like the name of the file and the type of file that you want to generate.  For this example, we’re going to include the name of our applicant in the file name.
 

Next, we’re going to setup the delivery of our document to Egnyte so that it is automatically saved in our customer’s folder within Egnyte.  From the Deliver tab, click the New Delivery button and then select Egnyte.

After you authenticate your Egnyte account, you’ll need to pick the folder that you want to save the document in.  For this example, we’re going to pick the root Customers folder. 

Then, to be able to save the document in a folder specific to our customer, we’re going to click More Options when select “Use merge fields as a subfolder” and use the applicant’s name.  This will automatically create a new folder for the customer when the document is saved.
 

Once you have the Egnyte delivery setup and saved, we’re ready to setup the integration with Salesforce so that we can populate this application with the click of a button.

If you have not already, please install the WebMerge Managed Package from the AppExchange and follow the install instructions.

Inside Salesforce, we’re going to setup a New Mapping.  We’re going to be pulling data from the Contact object, so go ahead and pick that object, then pick the WebMerge document that you just setup in WebMerge.
 

Click Next and then you’ll be taken to a page where you’ll see a list of the merge fields in your document.  For each of the merge fields, you need to pick the corresponding fields from Salesforce so that the system knows how to send your data over to WebMerge so that it is populated in the correct spot on your template.
 

Once you have saved your mapping, let’s generate a document!  Go to one of your contacts and click the WebMerge button.  You’ll be taken to a page that lists out the documents you’ve mapped to the Contact object – go ahead and pick the Application document.
 

After click the Merge Now button, the data will be sent over to WebMerge and your application will be generated then saved in Egnyte!  It’s that easy.

Here’s what Egnyte looked like after our application was saved:
 

Congrats, you’re all done!  You can now automatically generate all kinds of documents and save them in Egnyte.  Can you think of any other ways that you could use WebMerge to simplify your paperwork process?